What Is a Risk Management Plan & How To Create (+ Template)


A risk management plan (RMP) helps you identify project threats before they derail timelines, budgets, or stakeholder trust. I’ve seen solid projects fail because teams treated risk planning like paperwork instead of a decision-making tool.
In this guide, you’ll learn how to build a practical plan that helps you assess risk impact, respond faster, and avoid the mistakes that sink projects.
What Is a Risk Management Plan?
A risk management plan is a document describing how your project team will monitor and respond to risks, issues, or other unexpected or uncertain events that could impact the project.
It analyzes the potential risks that exist in your organization or project, identifies how you will respond to those risks if they arise, and assigns a responsible person to monitor each risk and take action, if needed.
In its most minimal form, a risk management plan could be a handful of pages describing:
- at what point the project risk should trigger an escalation
- how and when to assess risk
- the roles and responsibilities for risk owners
What Is the Purpose of a Risk Management Plan?
The purpose of a risk management plan is to help you identify project risks and other potential issues before you start work on the project, so you can create a plan to mitigate them, instead of responding reactively when things do go wrong. The earlier you identify and catch risks, the lesser their impact.
It also helps you plan and manage uncertainty more consistently, as well as keep your project on schedule, within budget, and within scope.
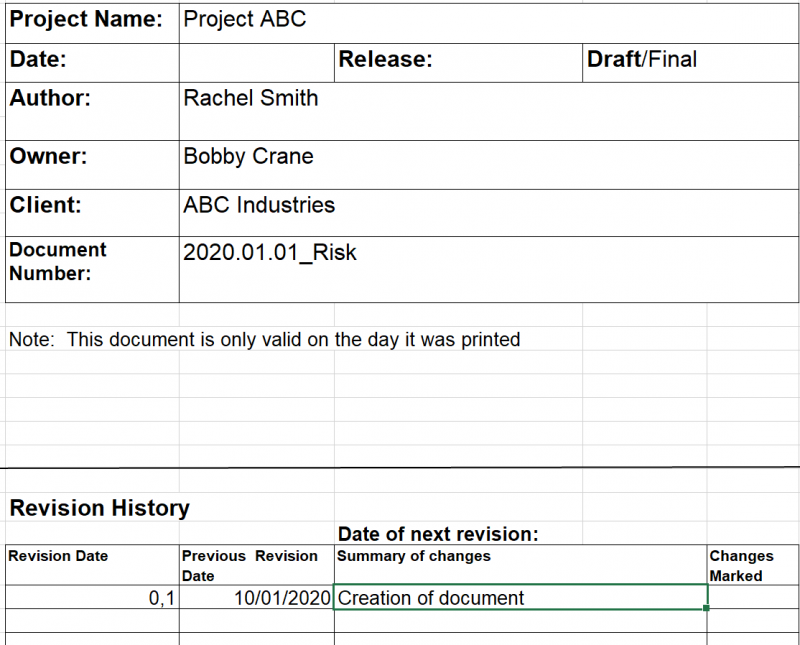
Risk Management Plan Template
DPM members can download our simple risk management plan template.
Here's how to use it:


What to Include in a Risk Management Plan
Here are the key components to include in your risk management plan.
Risk Management Approach
Detail your overall strategy and approach to risk management. This includes:
- Risk tolerance: Determine what level of risk you're willing accept on your project. Your organization might have larger guidelines for this that are standard across every project.
- Risk mitigation strategies: Define how you'll make use of methods like risk avoidance, risk transference, and risk sharing. This also includes tools like risk matrices, SWOT analyses, and probability and impact assessments.
- Risk governance: Determine ownership over individual risks and over risk management more broadly, and discuss the rules and conventions that you'll need to follow as you're managing risks.
RAID Log
A RAID log tracks risks, assumptions, issues, and dependencies so that the project team and sponsor can review and further discuss.
This is more lightweight than a formal risk register designed to calculate risk severity. For an even simpler approach, you might just maintain a list in your weekly status report. This is useful for small, non-technical projects being executed by a team of 3-4 people in an org that does not have a standard approach to risk management.
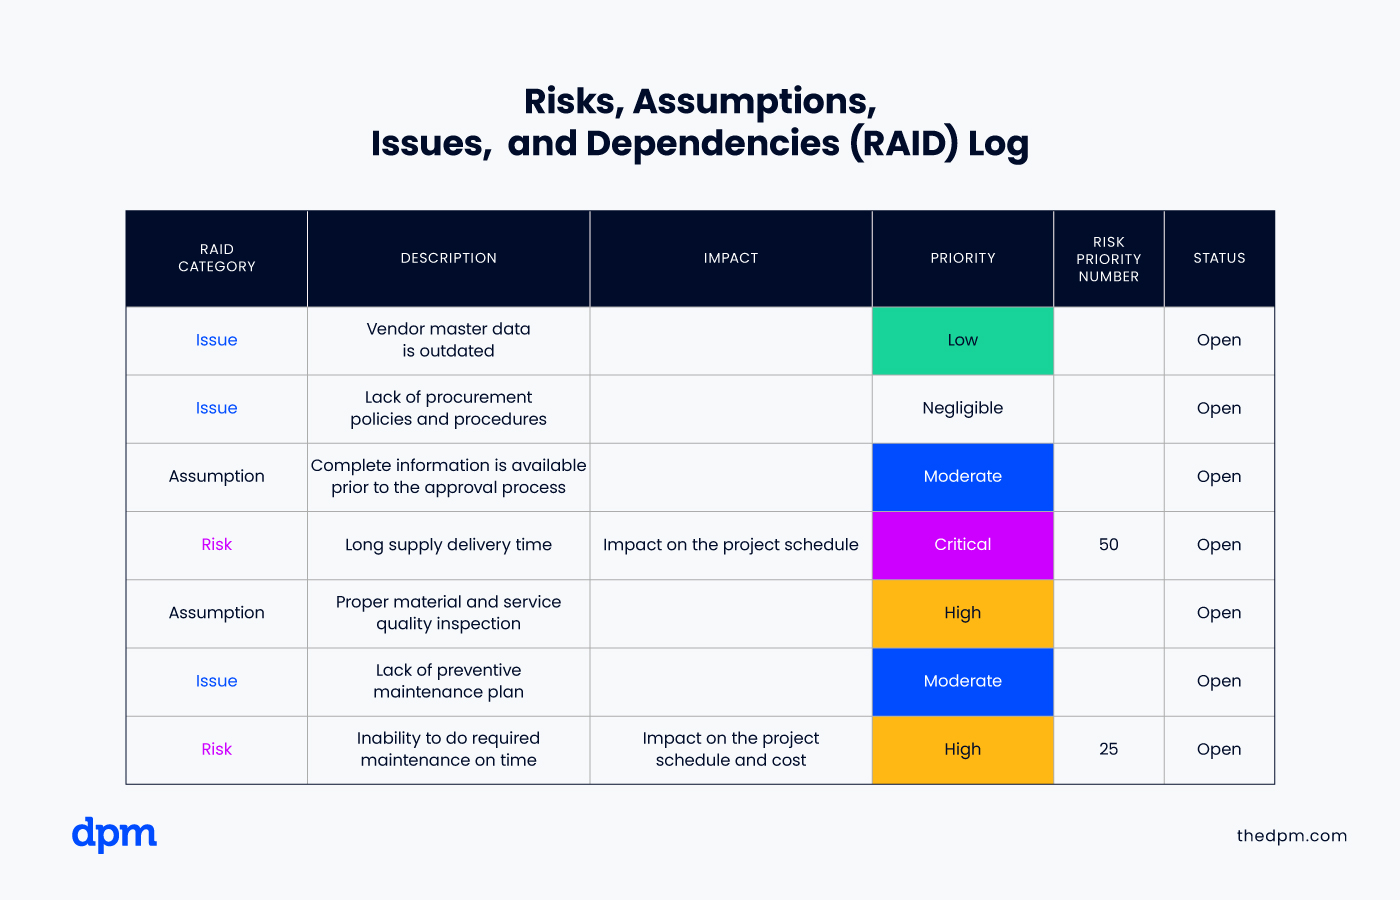
If your project goes perfectly, you’re a very lucky person. Things can go wrong; things do go wrong. Use your RAID log to identify where things are going to go wrong. Plan how you’ll get those resolved in the quickest possible way to keep the project on track.
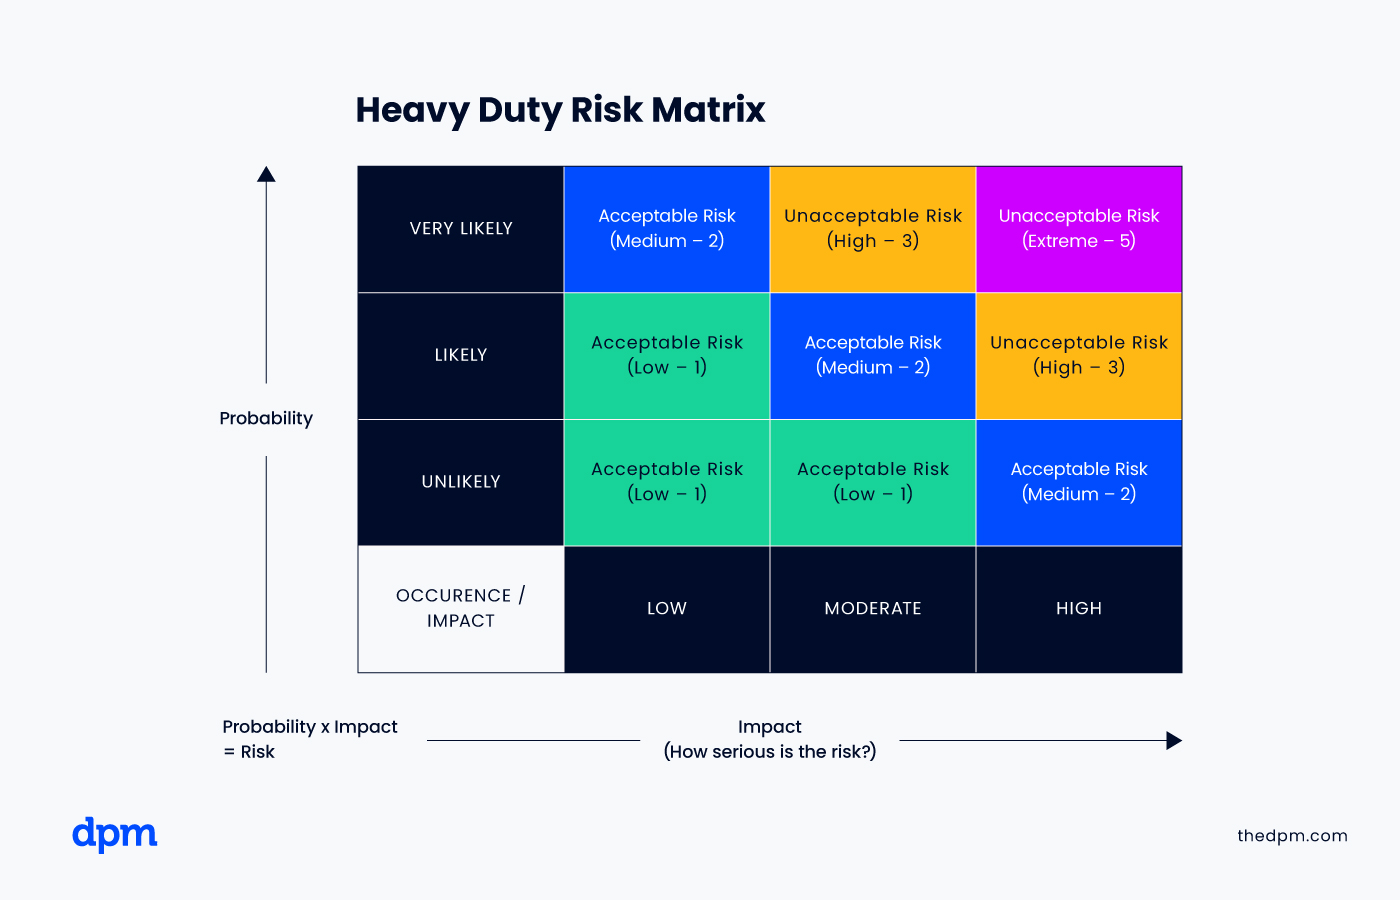
Risk Matrix
A risk matrix (also known as an impact matrix or risk assessment matrix), shows the relationship between risk factors in calculating risk severity. Risks that are high-probability and high-impact are the most severe.
This is a more thorough approach that demands a high level of detail. You might also include a full description of the methodology that you'll follow to perform qualitative and quantitative risk analysis, along with an impact matrix. You can also use it to prioritize and assign numerical severity scores to measure the level of each risk.
Risk Breakdown Structure
You can create a risk breakdown structure to decompose higher-level risk categories into smaller, more specific risk subcategories
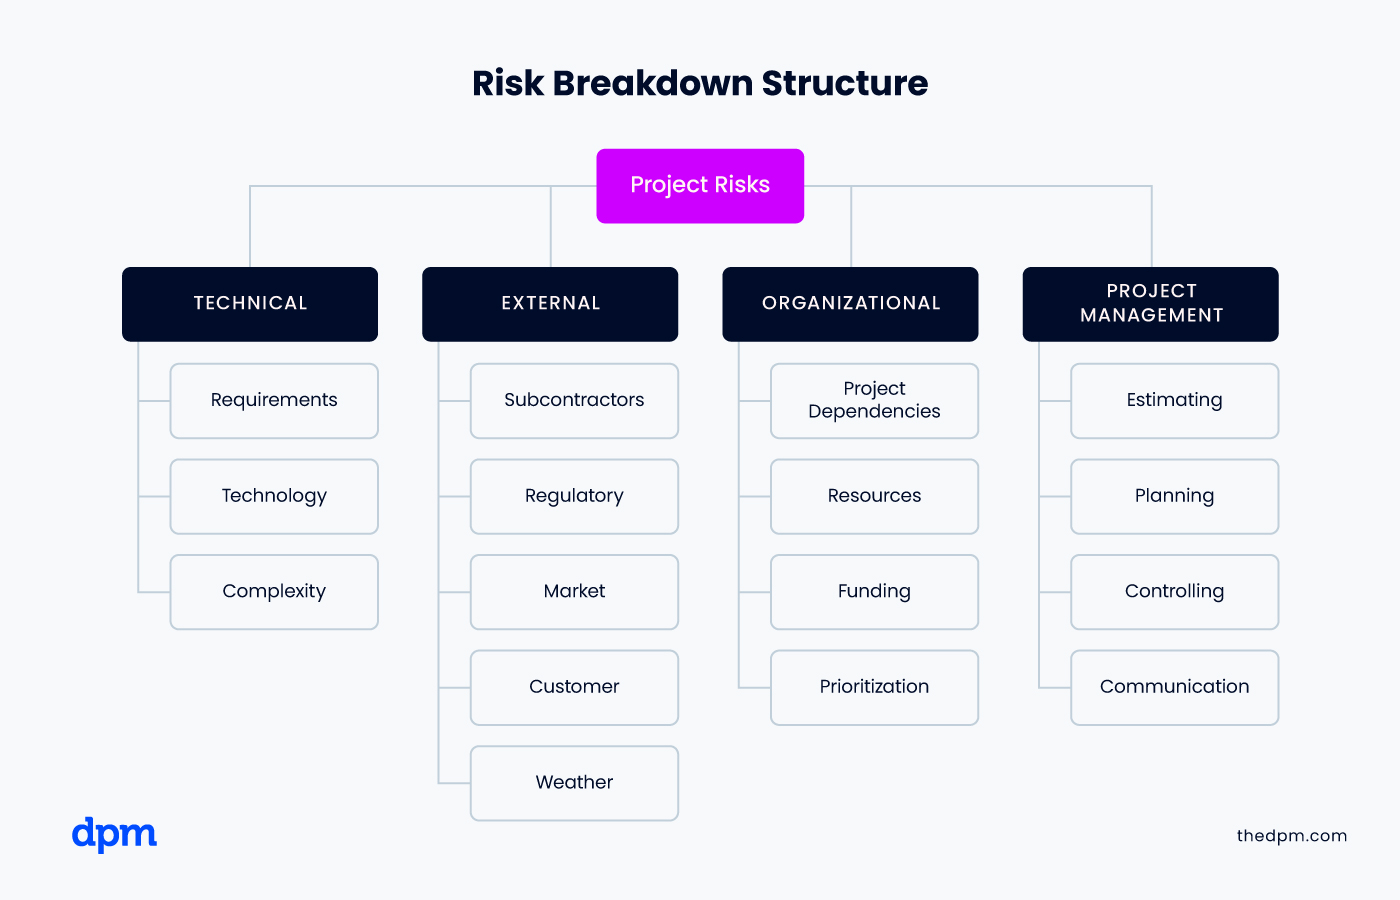
This isn’t about creating complexity—you and your team will be glad to have this level of detail on large enterprise projects that involve more teams, multiple stakeholders, and high stakes that could have a significant impact on the business.
Risk Management Software
Risk management software and project management software can support risk management planning, substitute loads of manual work, and facilitate discussions with your team and project sponsor about how to navigate risks to increase the likelihood of project success.
You might also use GRC tools, which cover a broader scope and integrate the entire risk management process with the wider project management plan. They typically include risk management features but extend to compliance tracking, policy management, regulatory reporting, and internal audits.
How to Create a Risk Management Plan
Here are the steps in the process of creating a risk management plan.
1. Prepare Supporting Documentation
Review existing project management documentation before you craft your risk management plan. This documentation includes:
- Project charter: This establishes the project objectives, the project sponsor, and you as the project manager. It gives you the right to create a project management plan and risk management plan. If you don't use formal project charters at your org, you should at least have this documented in an email or a less formal brief.
- Project management plan: This outlines how you’ll manage, monitor, and control your project, including what project methodology to use, how to report progress, how to escalate issues, etc. Your risk management plan is a subcomponent of the project plan.
- Stakeholder register: Have a solid idea of who the project stakeholders are before assessing risk. Each stakeholder group presents a different set of risks when it comes to people, processes, and technology. You can also invite stakeholders to identify risks throughout the project and even nominate them as risk owners.
2. Set the Context
Take the project description and objectives from the project charter and use them to outline the business value of the project and the negative impacts that would result should the project fail.
The introduction to your risk management plan should explain its intent and relationship to the overarching project plan. Use this context to drive a conversation about risk management with your team and your project sponsor.
3. Decide How to Identify and Assess Risks
Different methodologies are appropriate for different types of projects. The methods you choose also need to be sustainable for the team to perform throughout the project.
The key is to have the right discussions and gather input to build consensus with your team and your stakeholders early in the project life cycle. Use these discussions to agree on risk categories, risk response plans, and ways to calculate risk severity.
4. Continuously Identify Risks
Hold a risk workshop or group session involving your team, key stakeholders, the project sponsor, and subject matter experts to identify, evaluate, and plan responses to risks.
Update your risk management plan directly during the workshop:

Discuss everything in columns E-R and make sure you have clear, SMART outcomes in each box. Your role is to facilitate the meeting and brainstorm with stakeholders to evaluate both known risks and possible risks that may not have been considered.
At the end of the workshop, you should have stakeholder alignment on project risks, the desired risk response, and the expected impact of the risks. Stakeholder buy-in is critical for a successful risk response.

5. Assign Risk Owners
As you identify risks, work with the team to assign owners, including yourself, where necessary. The project manager can’t own everything. Assigning risk owners can be difficult because it requires stakeholder accountability.
Make sure that risk owners have reviewed the risk management plan and are clear on their responsibilities. Follow up with them as you monitor risk throughout the project life cycle.
6. Populate the Risk Register
Following the risk workshop, finish populating any information required for the risk register. This includes a description of the risk, the risk response category, detailed risk response, risk status, and risk owner.

Make sure the risk response reflects the severity and importance of the corresponding risk. Review the risk register to understand any wider correlations that might exist among risks.
7. Publish the Risk Register
Send around the updated risk register within 48 hours of the workshop to give everyone time to read and process the output.
You can also use the risk register within wider project discussions to explain or define the timeline for a project or specific actions that need to be completed. It’s important to be timely so that the output can be used in other project artifacts.
8. Monitor and Assess Risks Continuously
You'll run into new risks constantly throughout the project. In fact, mitigating one risk might create another risk or leave “residual risk.”
If feasible, run risk workshops periodically throughout the duration of the project or incorporate risk register reviews into other recurring planning activities. You can also use root cause analysis to better understand how risks are emerging, especially when the same types of issues keep showing up.
Nothing feels quite as deflating as when you swerve to avoid one risk only to drive blindly into another, much bigger risk.
9. Archive Your Plan
After your project, archive your risk management plan for future reference. While not every risk management plan suits every project, the risk and response strategies may remain applicable. Use past risks to create a foundation for your next project.
Risk Management Plan Example
Here’s a simple example of risk management that saved a project:
An agency agreed to an aggressive timeline for a highly technical project. The team had raised concerns as the project was being initiated, but leadership still wanted to proceed. The project manager and technical architect logged the timeline risk before the project started, and their risk response strategy was to re-evaluate the project timeline using a Monte Carlo simulation.
After calculating a pessimistic, optimistic, and likely duration for every project activity on the critical path, they determined mathematically that the project had a 3% chance of hitting the deadline.
Here's how this might appear in your risk register:

The project manager raised this with the client, and the client agreed to re-scope the project and re-baseline the project before getting going. It was too big of a risk for them to take.
What's Next?
Whether you’re a novice project manager or a seasoned pro, having a good risk management plan is vital to project success. And, the key to a successful risk management plan is adaptability. You need to make sure that, with every project you run, you can adapt the risk management plan to your project, industry, and organization.
Dive deeper into these strategies by enrolling in one of these comprehensive risk management courses.
