How To Use Asana For Project Management

Using Asana for Project Management
Asana is a work management platform that helps project managers in SaaS B2B companies organize, track, and coordinate team efforts across multiple projects. It provides structured workflows, task assignments, and visibility into project progress so teams can deliver on time and stakeholders stay informed. Project managers use Asana to replace scattered emails and spreadsheets with a centralized system where work happens in one place.
Prerequisites and Setup Requirements
Before using Asana for project management, ensure you have:
- An Asana account with project creation permissions (available on all plans)
- Team members invited to your Asana workspace
- A clear understanding of your project goals, deliverables, and team structure
No additional modules or advanced plans are required to start managing projects, though some automation and reporting features require paid tiers.
How Asana Supports Project Management
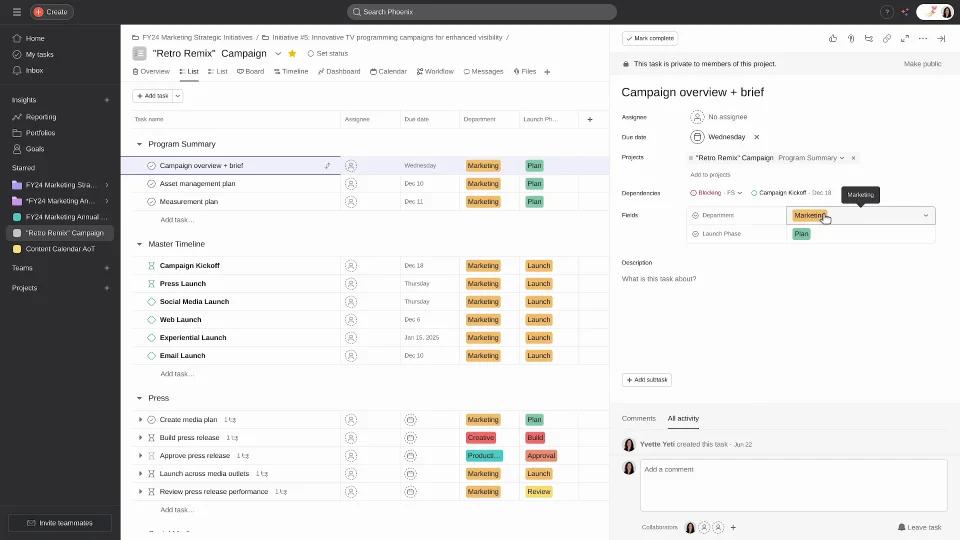
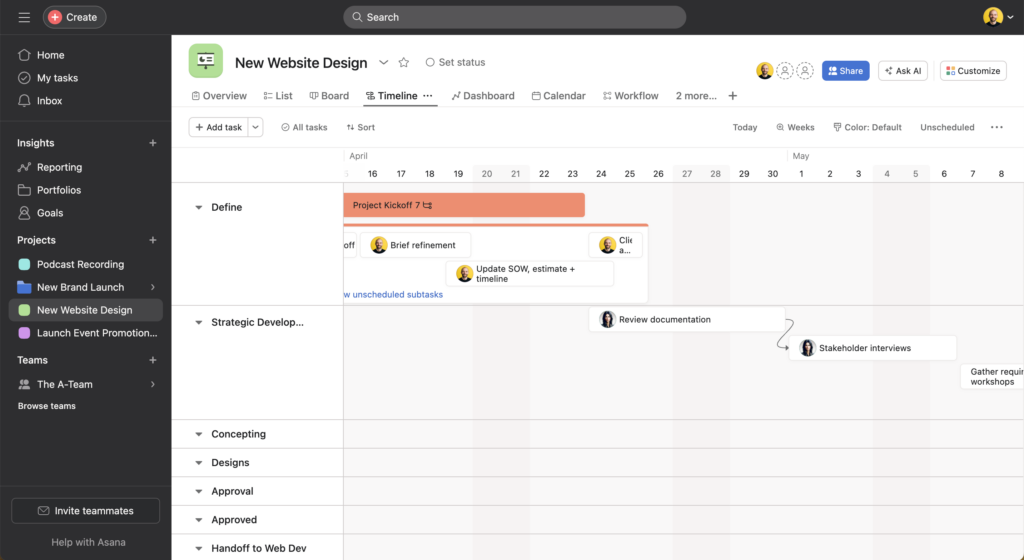
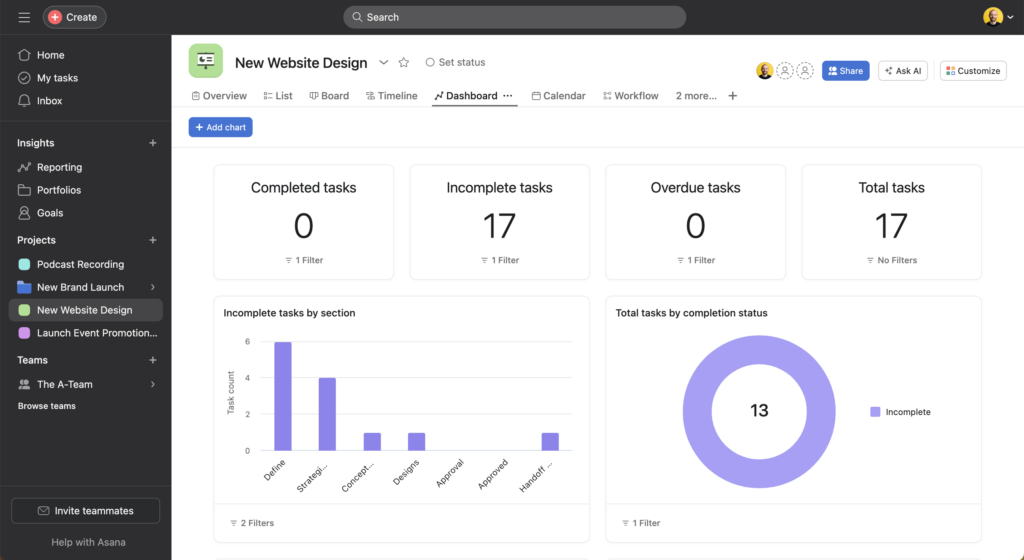
Asana enables project management through projects, tasks, and timelines that create structure around teamwork. Project managers use projects as containers for related work, breaking them into tasks with assignees, due dates, and dependencies. The platform provides multiple views (list, board, timeline, calendar) so teams can visualize work in the format that best suits them. Custom fields, task dependencies, milestones, and status updates help managers track progress and communicate with stakeholders without leaving the platform.
How to Perform Project Management in Asana

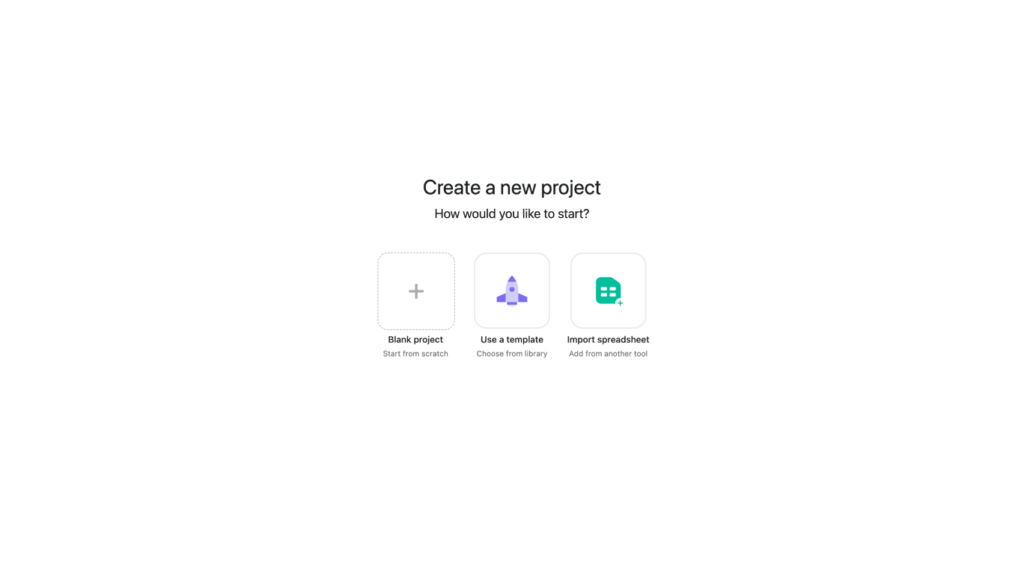
Create your project
Create a new project by clicking the orange "+" button, selecting "Project," and choosing a template or starting blank.
Configure project settings
Name your project, choose a list or board layout, set privacy settings, and add team members.
Add your tasks
Add tasks by clicking "Add task" under each section, naming each deliverable or action item.
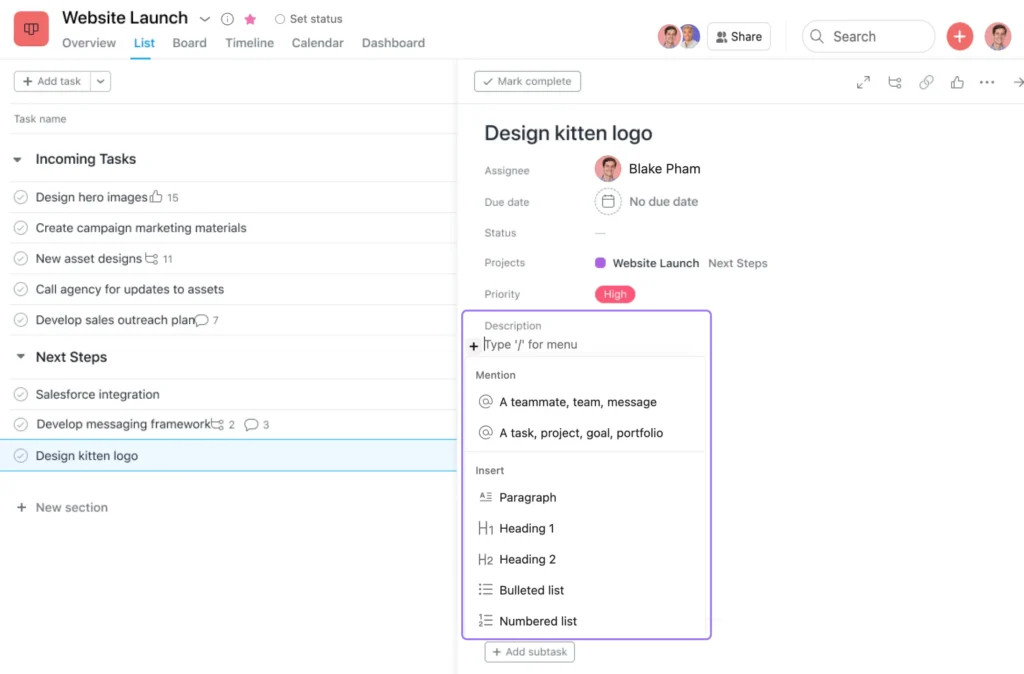
Include task details
Add descriptions, attach files, and include context in the task detail panel so assignees have what they need.
Assign ownership and deadlines
Assign each task to a team member and set due dates to establish your timeline.
Set up dependencies
Create dependencies by opening a task, clicking the three dots, and selecting "Mark as dependent on."
Visualize your timeline
Switch to Timeline view to visualize your schedule, set milestones, and identify potential conflicts.
Track custom information
Use custom fields to track priority, status, or other project-specific information.

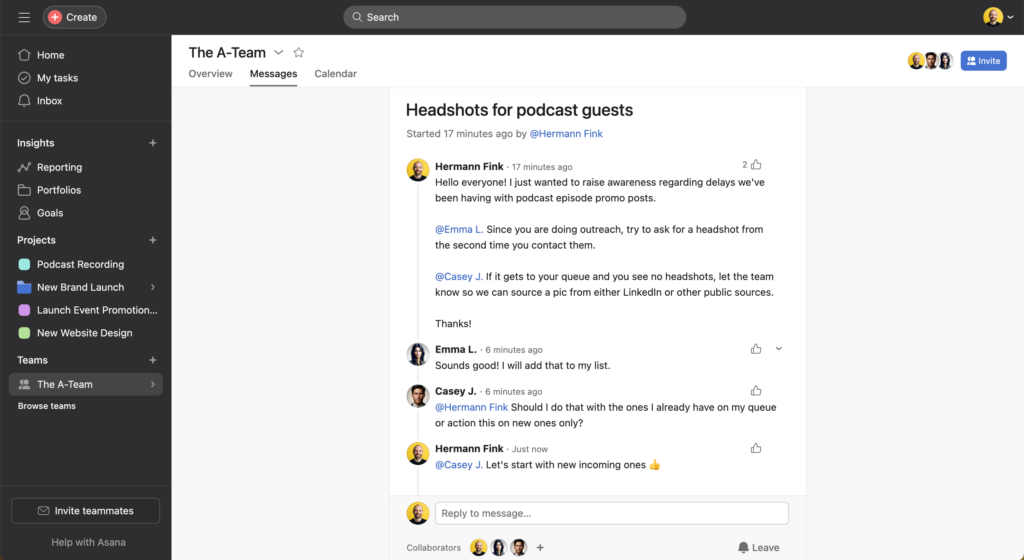
Communicate progress
Post status updates from the project header to keep stakeholders informed of progress.
Monitor and adjust
Monitor completion and adjust assignments, dates, and priorities as the project evolves.
What Success Looks Like
You've successfully set up project management in Asana when your project contains all necessary tasks with clear owners and due dates, dependencies reflect the actual work sequence, and team members can see what they're responsible for. Your timeline view shows a realistic schedule with minimal conflicts, and stakeholders receive regular status updates via the project feed. Tasks move through your workflow stages as work progresses, and you can answer "what's the status?" questions by looking at the project rather than chasing people for updates.
Common Mistakes and Pro Tips
Common Mistakes:
- Creating too many subtasks instead of keeping task structures simple and scannable
- Forgetting to set dependencies, which leads to scheduling conflicts and missed handoffs
- Not using sections or custom fields to organize tasks, which makes large projects difficult to navigate
- Skipping regular status updates, leaving stakeholders uninformed about progress or blockers
Pro Tips:
- Use project templates for recurring project types to save setup time and maintain consistency
- Set up rules or automations to move tasks between sections automatically when the status changes
- Create a project brief in the overview tab so everyone understands goals and context
- Tag tasks with custom fields for filtering and reporting across multiple projects
FAQs About Using Asana for Project Management
Can I manage multiple projects at once in Asana?
Yes, you can create and manage unlimited projects in Asana. Use portfolios to group related projects and track their collective status in one view. This helps you monitor multiple initiatives without switching between project tabs constantly.
How do I track time or budgets in Asana?
Asana doesn’t include built-in time tracking or budget management, but you can use custom fields to manually track estimates and actuals. For advanced needs, integrate Asana with time tracking tools like Harvest or Clockify through native integrations.
What happens when a task deadline is missed?
Asana highlights overdue tasks in red and shows them at the top of relevant views. You’ll need to manually adjust the due date or mark the task complete. Set up rules to notify you when tasks become overdue so you can address delays quickly.
Can external stakeholders see project updates?
Yes, you can invite external collaborators as guests to specific projects without giving them access to your entire workspace. They’ll see only the projects they’re added to and can comment, view tasks, and receive updates.
How do I handle changes to project scope or timeline?
Adjust tasks, dates, and dependencies directly in your project as changes occur. Use the timeline view to drag tasks to new dates and see ripple effects. Post a status update explaining the change so your team and stakeholders understand the impact.
Learn More About Asana
Asana supports more than just individual project management—it can help your team coordinate across portfolios, automate repetitive workflows, and gain visibility into organizational priorities. Explore how Asana can scale with your team's needs by visiting asana.com or speaking with their team about advanced features like workload management, goals, and custom reporting.